Apple & Cinnamon Muffins with Crumble Topping

Apple & Cinnamon Muffins

Apple and cinnamon is one of my all time favourite combinations and the two flavours come together beautifully in these muffins. The crumble topping can be omitted but it adds a bit of extra bite and texture and reminds me of the apple & cinnamon muffins that Starbucks used to sell. These are perfect for putting in lunch boxes for a sweet treat – yes, they contain sugar but they beat shop bought biscuits and cereal bars hands down in my book.

Ingredients (makes around 12 muffins):

  • 100 g butter
  • 2 eggs
  • 120 g sugar
  • 1 tsp vanilla essence 
  • 200 ml milk 
  • Grated zest from one lemon
  • 200 g plain flour 
  • 2 tsp baking powder
  • 1 pinch of salt

Filling:

  • 3 large apples
  • 1 tbsp butter for frying
  • 2 tbsp sugar
  • 2 tsp ground cinnamon

Crumble topping:

  • 75 g cold butter
  • 50 g rolled oats
  • 50 g plain flour
  • 80 g sugar

Method:

  1. Preheat the oven to 200 degrees. In a bowl whisk together eggs, sugar and vanilla essence until light and fluffy. Melt the butter and add to the egg mixture along with the milk and lemon zest.
  2. Mix together the flour, baking powder and salt in a separate bowl before adding to the batter.
  3. Cut the apples into small slices and fry them in butter, sugar and cinnamon. Let them cool down slightly.
  4. Add the apples to the batter and and fill up paper cases placed in a muffin tray until 2/3 full.
  5. Cut the cold butter into small pieces and pinch together with the oats, flour and sugar in a bowl.
  6. Scatter some crumble on top of each muffin.
  7. Bake in the oven for 12-15 minutes.

NB: I had a lot of crumble topping left over so next time I will either halve the quantities or have some more fruit the ready to make an apple crumble at the same time.


Recipe: White chocolate & lemon cake

lemon & white chocolate cake

One of the things I love about living in a country with distinct seasons is how the food that we eat changes as we move from one season to the next. In summer it’s all about fruit, salads, seafood, barbecues and chilled rose wine, preferably enjoyed al fresco with the warm sun beating down. As the weather gets colder I start to crave richer and heavier foods like casseroles, lasagne (with or without the pasta), apple pie, and look forward to sipping hot chocolate or red wine in front of an open fire.

I’m sure my waistline would benefit from living in a warmer climate but my taste buds would definitely miss the autumnal fare. I am starting to draw up a list of recipes that I want to try this season but in the meantime this lemon and white chocolate cake is perfect for the Indian summer we’re having at the moment when it’s still warm enough to enjoy a cup of coffee and slice of cake out in the garden.

Ingredients:

  • 100 g butter
  • 100 g white chocolate
  • 2 egg
  • 200 ml sugar
  • 2 teaspoons vanilla extract
  • 250 ml plain flour
  • Grated zest from one lemon and 1/2 teaspoon lemon juice


  1. Whisk the egg, vanilla extract and sugar in a bowl until light and fluffy
  2. Melt the butter and stir in the chocolate. Add to the bowl
  3. Stir in the flour, lemon zest and juice
  4. Pour the batter into a greased loose base cake tin
  5. Bake for 15-20 minutes in the middle of the oven at 200 degrees
  6. Sift over some icing sugar and serve with raspberries and whipped cream

Raspberry Jam Biscuits

Hallongrottor 2

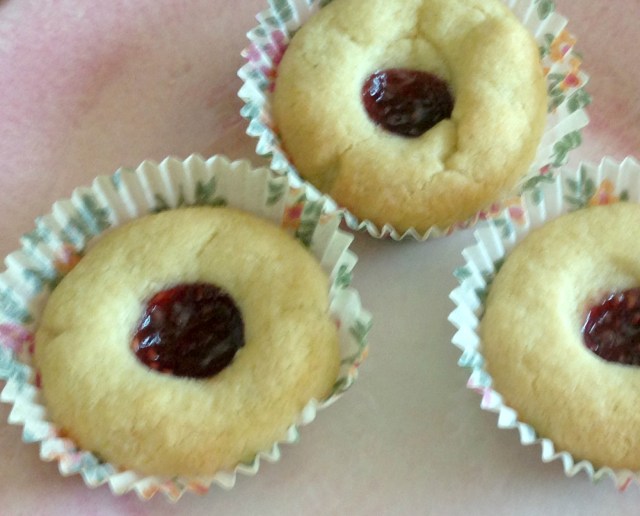
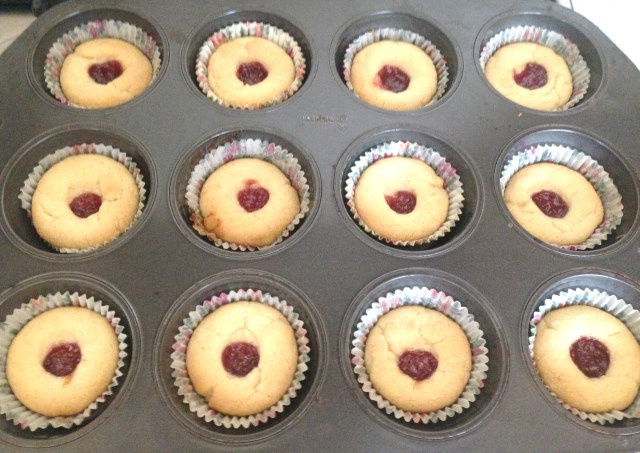
These biscuits are a real favourite of mine. In Swedish they’re called Hallongrottor which translates to ‘raspberry caves’ and they remind me a bit of jammy dodgers although they’re much nicer than the shop bought ones. They also freeze really well so I like to whip up a big batch and keep for impromptu coffee mornings.

Ingredients:

200g butter at room temperature

100ml caster sugar

1tbsp vanilla essence

450ml plain flour

1tsp baking powder

150ml raspberry jam

Hallongrottor 3

Method:

1. Preheat the oven to 175 degrees

2. Stir together the butter, sugar and vanilla until smooth and light. Mix the flour with the baking powder in a separate bowl before working in to the dough.

3. Divide the dough into 20 pieces of equal size and roll into round balls. Place in muffin cases and, using your finger, make a small indentation in the middle.

4. Fill the indentations with raspberry jam and bake in the oven for 12-14 minutes.

Hallongrottor 1

Sunny Sunday ♥

enjoy-600x400-1

It’s late Sunday night, way past my bedtime really as I’ve got work tomorrow but just wanted to squeeze in a quick post to finish the week off. It has been a lovely weekend – less busy than of late which is exactly what we needed. A full social life is great but too much of a good thing can be, well, too much sometimes.

I went for dinner at a friend’s house on Friday but yesterday was mostly spent at home apart from swimming and ballet lessons in the morning and a trip to the supermarket in the afternoon. Gardening, catching up on homework and watching the World Cup were all on the agenda. Today Casper’s school held its annual summer fete which is always a fun day out. The kids had a great time catching up with friends, spending their pocket money on silly toys that will last all of five minutes and eating far too many sweets.

IMG_7471

{Clemmie and Casper going down the bouncy castle slide at the summer fete }

IMG_7473

{Cameron spent most of the afternoon at the ‘Beat the Goalie’ stall. As long as he’s got a football, he’s happy!}

IMG_7472

{Clemmie held on very tightly to her lucky jar. Prior to the fete parents are asked to fill jam jars with sweets and small toys which are then sold for £1 on the day.}

IMG_7449

{I also managed to do some baking today as it’s Clemmie’s birthday this week and she’s having a little party for her friends on Tuesday.}

Definitely time to go to bed now! Hope you’ve all had a great weekend. X


Recipe: Apple Crumble Pie with Salt Flakes

IMG_0129

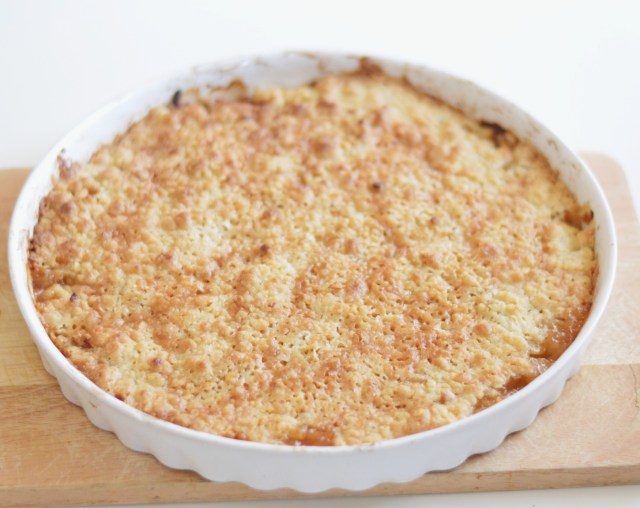
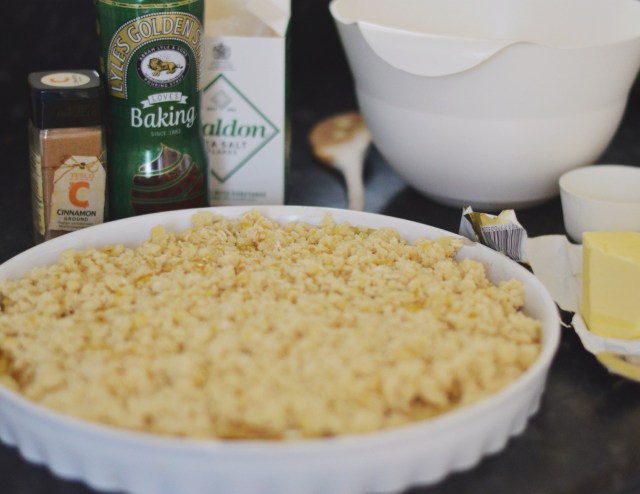
With Easter’s chocolate egg overload just behind us, I’m sure the last thing on anyone’s mind is more sweet treats. But I couldn’t resist sharing the recipe for this apple pie which I made for pudding when my parents came over for lunch last week. Trust me, it’s definitely one to file away for a rainy day: along with cottage pie and grilled cheese, apple pie/crumble must be one of the ultimate comfort foods. And don’t be alarmed by the salt flakes specified in the recipe – they provide a beautiful contrast to the sweet crumble topping and tart apple. And the secret to getting a really yummy caramelized topping? Drizzle some golden syrup over the pie before it goes in the oven.

Apple Crumble Pie with Salt Flakes

Filling:

approx 800 g apples
1 tsp cinnamon
2 tsp sugar
1 pinch salt flakes

Crumble topping:

125 g cold butter
140 g plain flour
25 g rolled oats
125 g caster sugar
1 1/2 tsp salt flakes

Golden syrup

Method:

Pre-heat the oven to 225°C and grease a pie dish (approx 28cm in diameter). Crumble topping: cut the butter into pieces. Pinch together butter, flour and oats to form a crumbly mixture. Add the sugar and salt flakes. Peel, core and cut the apples into thin slices before mixing with the cinnamon, sugar and salt. Put the apple slices in the bottom of the prepared pie dish and sprinkle the crumble mixture over the top. Drizzle some golden syrup over for a tasty toffee-like finish. Bake in the middle of the oven for 20-25 minutes. Let it cool slightly and serve with whipped cream, custard or ice cream.

NB: As my husband can’t eat gluten, I made this crumble with gluten free flour and oats. It worked really well.

IMG_0131

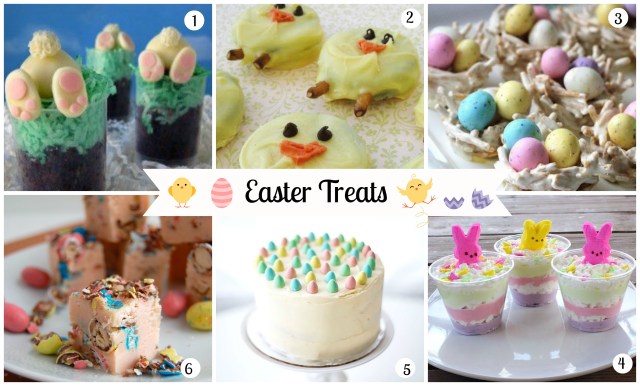
Easter Treats

As I’ve been working more than usual over the school holidays I haven’t had much time for baking, so it’s likely that my lot will have to make do with shop bought treats over the Easter weekend. But if you have the time, here are some of the most tasty (and pretty) looking recipes that I have found on Pinterest.

Easter Treats

1. Down the Rabbit Hole Cake Push Pops

2. Oreo Cookie Chick Easter Treats

3. Springtime Birds Nests

4. Easter Egg Fudge

5. Mini Easter Egg Cake

6. Healthy Easter Treats

For more Easter recipes and ideas see my Easter Inspiration board on Pinterest.

Recipe: Blondies with Brown Sugar Frosting

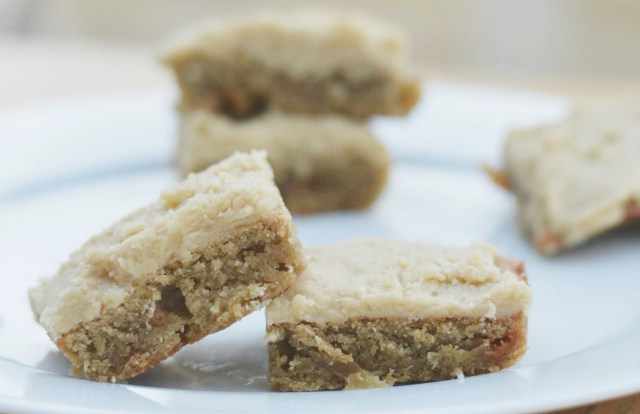
Blondies

I’m not a big fan of chocolate cake so it will come as no surprise to hear that brownies don’t feature high on my list of favourite things to bake. Recently though, I’ve come across several recipes for blondies – basically brownies without the chocolate – which I had earmarked to try on a rainy day. Well, yesterday that rainy day finally materialised. It was the first day of the Easter holidays and with Clemmie still recovering from flu and the aforementioned rain pouring down outside, it was the ideal time for all of us to get stuck into some baking. With icing sugar covering every surface of the kitchen like fairy dust, we measured, poured and stirred in relative harmony.

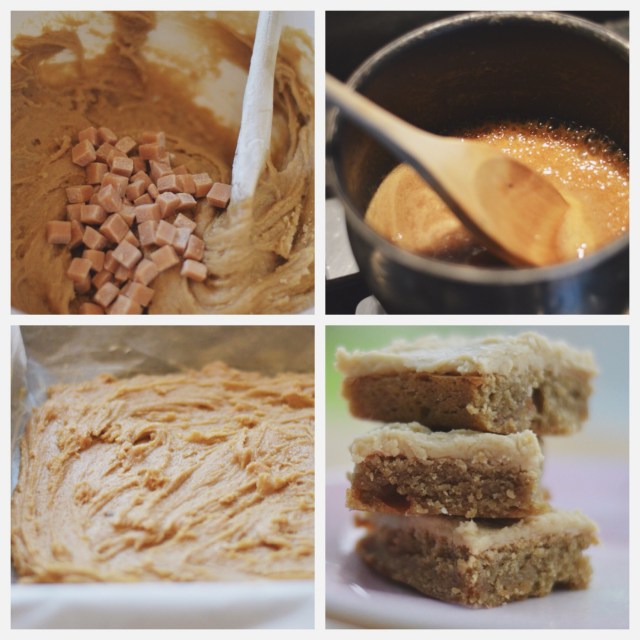
And the end result? Well, the kids loved the frosted blondies but they were a little bit too sweet for my liking. I think next time I will omit the frosting and use the chocolate chips specified in the original recipe (we were out of chocolate chips so I used some mini fudge pieces I found in the cupboard instead). It is a great basic recipe, however, and I look forward to experimenting with new flavours. I have seen recipes for banana blondies and peanut butter or salted caramel blondies, all of which sound yummy.

I used a mix of two recipes: one for basic blondies (any recipe that has ‘no fail’ in the title gets my vote!) and another one for the brown sugar frosting. I prefer to follow Swedish or American recipes as they tend to use cup or deciliter  measurements for the dry ingredients which I find easier than weighing everything. Usually when I’m making something that I plan to post in the blog, I measure the ingredients anyway but with three kids clamouring for the same wooden spoon I just didn’t have time. The first recipe includes the weight in grams but the frosting recipe only has cups measurements I’m afraid.

IMG_0122

Basic Blondies:

(Makes 16 bars)

Preheat the oven to 180 degrees. Butter or line an 8-inch by 8-inch (20 x 20 cm) baking pan with parchment paper.

Ingredients:

  • 1/2 cup (115 g) unsalted butter, melted
  • 1 cup (230 g) lightly packed dark brown sugar (I used light brown sugar which seemed to work fine)
  • 1 large egg
  • 
1 1/2 teaspoons vanilla extract
  • 1/2 teaspoon almond extract, optional
  • 1/8 teaspoon salt
  • 1 cup (140 g) all-purpose (plain) flour
Optional Extras (Add one or a combination to customize)
  • 1/2 to 1 cup chocolate chips (white, milk, semi-sweet, dark, etc.)
  • 1/2 to 1 cup chopped and toasted nuts
  • 1/2 to 1 cup chopped dried fruit or shredded/flaked coconut
  • 1/4 cup liquor (bourbon, whisky, rum, etc.) Note: Increase flour by 1 tablespoon to accommodate
  • 1/2 teaspoon flavourings or extracts (coconut, mint, rum, raspberry, etc.)

In a medium sized bowl, stir the melted butter and sugar until smooth. Stir in the egg, vanilla, almond extract (optional) and the salt. Add flour and stir until incorporated then mix in any extras such as chocolate chips, nuts or dried fruit. Pour the batter into the baking dish and bake for around 20 minutes until a toothpick inserted into the middle comes out relatively clean. Cool, then cut into 16 squares as they are or after adding the frosting.

Brown sugar frosting

  • 1/4 cup butter
  • 1/2 cup brown sugar
  • 1 cup powdered sugar
  • 2 tbsp milk
Melt the butter in a saucepan. Add brown sugar and stir until the mixture just comes to a boil. Remove from the heat and allow to cool for 5 minutes. Stir in the powdered sugar with a whisk. Spread the frosting on top of the blondies and allow to set before cutting into squares.

Recipe: Casper’s Super Gooey Yummy Chocolate Cake

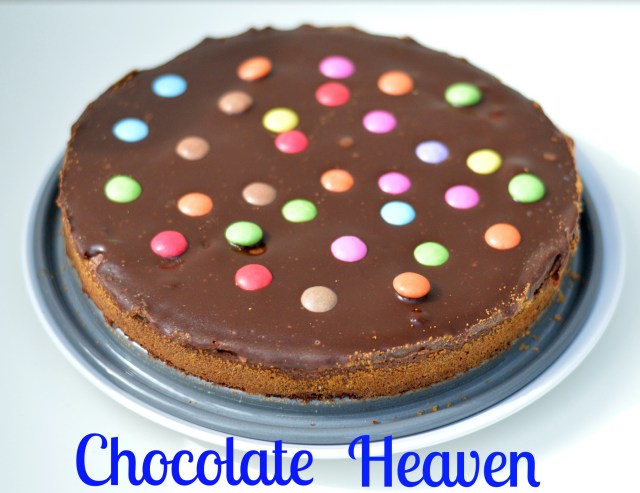
Chocolate Cake 1

I made this cake for the annual Mother’s Day tea party at Casper’s Beaver Scouts group this afternoon. It is such a lovely occasion; the boys are all dressed in their uniforms and look so proud as they show their mums to the tables and ask if they want tea or coffee, milk (skimmed or semi skimmed), sugar (how many) and what type of cake – lots of questions for a seven-year-old to remember! Casper did very well, especially as he had not only me to attend to but also his brother and sister who were both eager to get stuck into all the lovely cakes. At the end, all the mums were presented with a small bunch of daffodils and a homemade card with a picture of their son inside. So sweet!

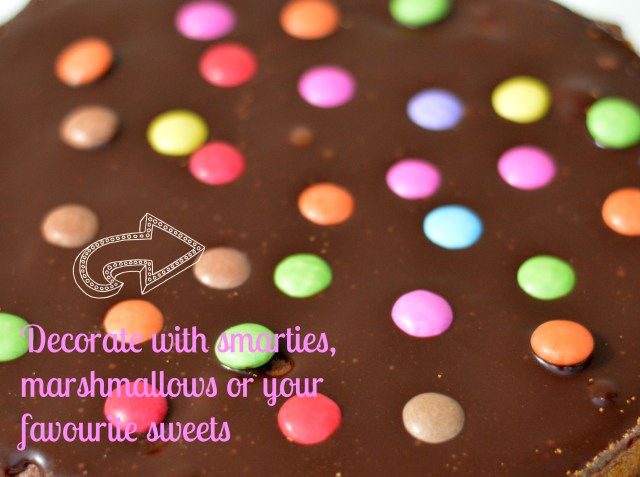
Personally I’m not a big fan of chocolate cake but ask Casper what his favourite thing in the world is and I guarantee that he will say ‘chocolate’. So you can imagine his delight when I suggested that we make this gooey chocolate cake with a chocolate fudge topping AND Smarties for the tea party!

Gooey Chocolate Cake

Ingredients:

100 g melted butter
2 eggs
230 g caster sugar
100 g flour                                                                                                                                                                                                                                                                                                                  40 40 g cocoa powder
1 pinch salt
A generous handful of chopped Daim

topping:
100 ml double cream
40 g caster sugar
50 ml golden syrup
50 g dark chocolate
50 g butter
Smarties, mini marshmallows or other sweets

Turn the oven to 175 degrees. Mix together all the dry ingredients in a bowl and then add the melted butter and finally the eggs and combine thoroughly. Stir in the Daim pieces and pour the batter into a prepared loose bottomed cake tin.

Bake in the middle of the oven for around 15-30 minutes, depending on the size of the tin. The cake should not be completely set in the middle. Let it cool down completely before you make the fudge topping.

Topping:

Combine all the ingredients for the topping, apart from the butter, in a saucepan. Bring to the boil and simmer for around 15 minutes until it thickens (make sure it doesn’t burn!). Take the saucepan off the heat and stir in the butter until you get a smooth fudge mixture. Spread the topping over the cake and let it cool slightly. Scatter Smarties, mini marshmallows or other sweets over before the topping sets completely. Put the cake in the fridge, ideally overnight, before serving.

Chocolate cake 2


Recipe: Daim Biscuits

Daim1 - edit

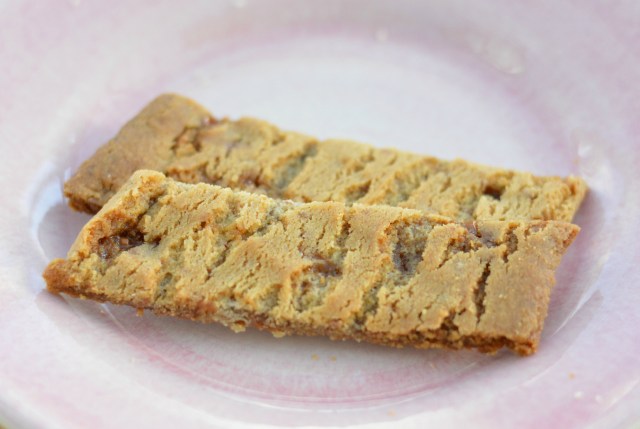
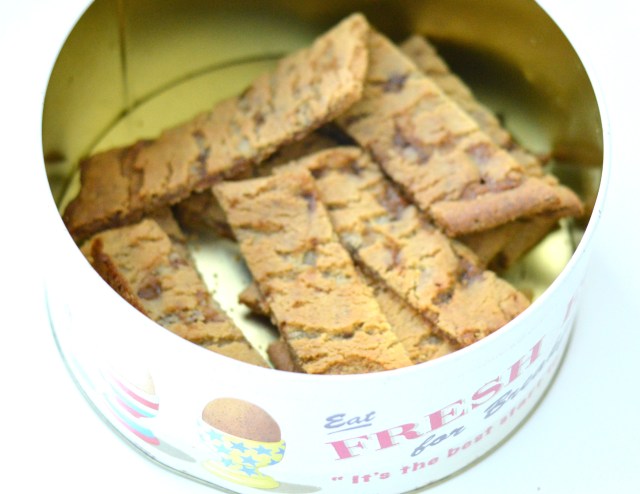
You can’t beat a good biscuit – together with a nice cup of tea (or glass of milk for the kiddos) it can turn a bad day into a bearable one with the first bite. The children and I first made these biscuits over half term and then Casper and I whipped up another batch this week when he was off school with an ear infection. I honestly think that just the delicious smell wafting through the kitchen did him as much good as all the spoonfuls of Calpol put together! If you don’t believe me, try them for yourself, quick and easy to make, they are the perfect mix of soft and crunchy – what’s not to love?

Daim biscuits:

(makes around 20-30 biscuits)
100 g butter (at room temperature)
80g caster sugar
1 tbsp vanilla essence
1 tbsp golden syrup
150 g plain flour
1/2 tsp bicarbonate of soda
2 regular Daim bars (crushed into small pieces with a pestle and mortar)

Mix all the ingredients in a bowl and knead into a dough. Divide in two pieces and roll into two long sausage shapes. Place them on a tray covered in baking parchment and flatten with your fingers. Bake in the oven at 175 C, for 12-15 minutes. Take out the tray and cut the biscuits diagonally before they have cooled.

Enjoy! X

Daim2 - edit

Five on Friday

nails1

I cleared out my old nail polishes and stocked up on a new colour (Smokin’ Hot by Essie – in a gorgeous deep grey with purple undertones) as well as a fast dry top coat by Morgan Taylor called Need for Speed

Daim1 - edit

It’s half term this week so on a rainy afternoon the children and I made these yummy Daim biscuits (as well as an almighty mess in the kitchen but these babies were well worth it)

Izzy Blow

I finally booked tickets to go and see the Isabella Blow exhibition Fashion Galore! at Somerset House. I’m going with a friend next Saturday – the day before it ends, talk about cutting it fine!

Tulips

My tulips from Valentine’s Day are still with us (just about). I saw a tip on the Internet which said that putting them in ice cold water made the flowers last longer. It seems to have worked.

Pretty-jars-980x735

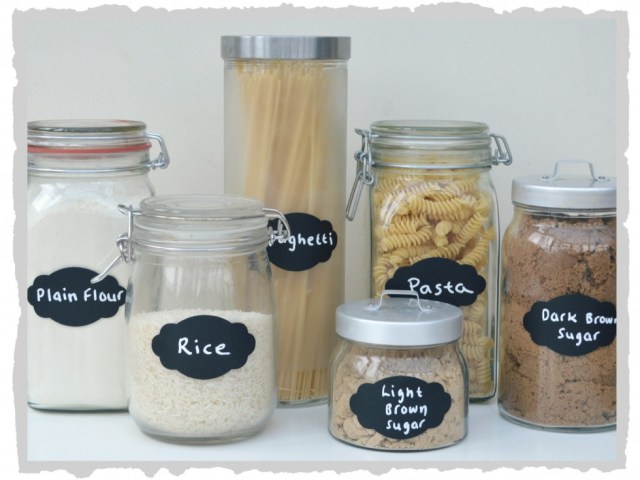
I’ve also been decanting my kitchen staples like flour, sugar, pasta etc into glass jars (mostly from Ikea) and labeling them with these cute chalkboard labels from Not on the High Street. Looks so much better than lots of half full bags and packets spilling stuff everywhere.

Happy weekend everyone! X